- これは
- 経緯
- AWS CodeArtifact とは
- AWS CodeArtifact を理解する
- AWS CodeArtifact をセットアップする
- AWS CodeArtifact を npm で使ってみる
- ということで
これは
YAMAP エンジニア Advent Calendar 2021 の第一日目の記事になる予定です。
経緯
社内で GitHub Package Registry を利用して、プライベートな npm パッケージをセットアップしています。
GitHub Package Registry を利用する為の GitHub アクセストークンが必要になりますが、誰の Github アクセストークンを使うのか問題にぶち当たりました。
Github Organization メンバー誰かの Github アカウントのアクセストークンを使うの論外、また、専用のアカウントを設けるのは、コストの観点から無し... ということで、AWS の CodeArtifact (以後、CodeArtifact) を試してみることにしました。
AWS 環境への CI/CD パイプライン用の IAM ユーザーは既に設定済みという状況なので、CodeArtifact との相性は良さそうです。
AWS CodeArtifact とは
ざっくり言うと、Python の pip や Node.js の npm 等の各種ソフトウェアパッケージのプライベートリポジトリサービスで、AWS の Code N 兄弟のうちの一つです。2020 年の 6 月にリリースされました。
類似のサービスとしては、上述の GitHub Package Registry 等が挙げられます。
CodeArtifact は、プライベートな独自パッケージのリポジトリ以外にも、既存の各種言語に提供されているパッケージマネージャーのプロキシとして動作します。サポートされているパッケージマネージャーは以下の通りです。
AWS CodeArtifact を理解する
概念図
以下、ドキュメントより引用。

AWS CodeArtifact の主な構成要素として、ドメインとリポジトリがあります。
ドメイン (Domain)
ドメインは、AWS CodeArtifact の最上位のエンティティで、ドメインの配下に複数のリポジトリを持つことが出来ます。ドメイン内のアセット (パッケージ) は KMS の暗号化キーで暗号化されます。すべてのアセットとメタデータはドメインに保存される為、複数のリポジトリに同じアセットが存在する場合、アセットはドメインに 1 つだけ保存されます。
リポジトリ (Repository)
リポジトリには、各アセットのバージョンセットが保存されます。1 つのリポジトリには、サポートされる全てのタイプのパッケージのエンドポイントを提供します。
AWS CodeArtifact をセットアップする
リポジトリの作成
とりあえず、手動で作ってみたいと思います。作り方はとっても簡単。
まずは、リポジトリを作成します。

パプリックアップストリームリポジトリには、maven や gradle や npm 等の主要な言語のパッケージマネージャを選択することが出来ます。これを設定すると、これらのリポジトリから取得したパッケージがドメイン内にキャッシュされます (ように振る舞う) 。
パプリックアップストリームリポジトリについては、今回は、何も設定せずに次のステップに進みます。
ドメインの作成
そして、始めて CodeArtifact をセットアップする際には、ドメインが設定されていないので、ドメインも設定します(※ なぜ、トップエンティティのドメインを最初に作らせないのか、モヤッとした感じはある。)

追加設定で AWS KMS キーを指定可能。特に設定しない場合には、AWS マネージドキーが設定されます。

セットアップ完了。
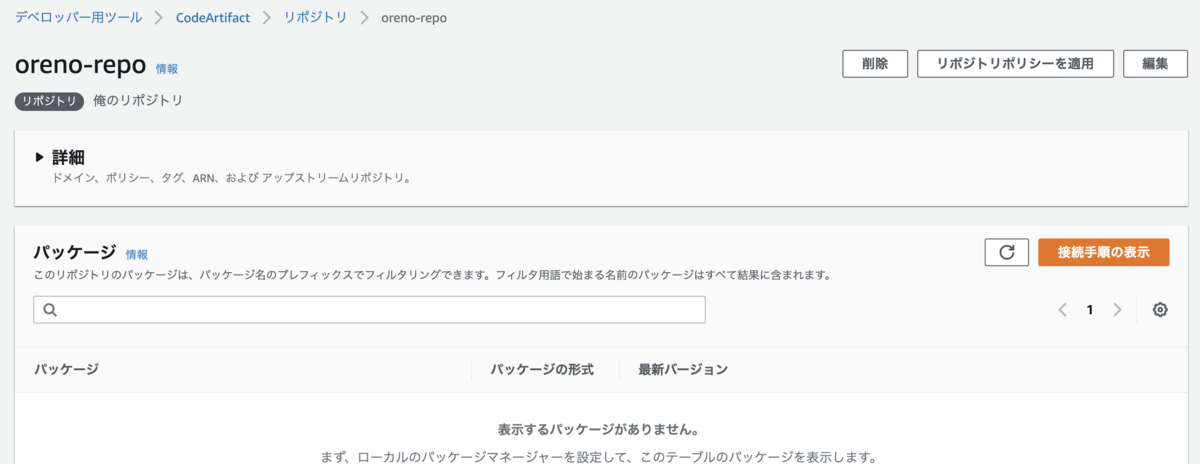
接続手順の確認
「接続手順の表示」をクリックすると、各パッケージマネージャ毎に CodeArtifact へのアクセス方法が表示されます。

今回は、npm を選択。

推奨設定では、AWS CLI を利用した手順が紹介されており、手動での設定手順も確認することが出来ます。npm の場合には、.npmrc ファイルを生成する手順が表示されます。
AWS CodeArtifact を npm で使ってみる
CodeArtifact に接続する為の初期設定
接続手順の確認にて確認した、AWS CLI のコマンドを実行します。
$ aws codeartifact login \
  --tool npm \
  --repository oreno-repo \
  --domain oreno-codeartifact \
  --domain-owner ${AWS_ACCOUNT_ID}
コマンドを実行して、正常にコマンドが終了すると、以下のように出力されます。
Successfully configured npm to use AWS CodeArtifact repository https://oreno-codeartifact-${AWS_ACCOUNT_ID}.d.codeartifact.ap-northeast-1.amazonaws.com/npm/oreno-repo/
Login expires in 12 hours at 2021-11-26 11:55:23+09:00
このコマンドが正常に終了すると、$HOME/.npmrc ファイルが生成されます。
$ cat $HOME/.npmrc
registry=https://oreno-codeartifact-${AWS_ACCOUNT_ID}.d.codeartifact.ap-northeast-1.amazonaws.com/npm/oreno-repo/
//oreno-codeartifact-${AWS_ACCOUNT_ID}.d.codeartifact.ap-northeast-1.amazonaws.com/npm/oreno-repo/:_authToken=xxxxxxxxxxxxxxxxxxxxxxxxxxxxxxxxxxxxxxxxxxxx
試しに npm search を実行してみる
パッケージを検索出来る npm search xxxxx を実行してみます。
$ npm search aws
以下のようにエラーとなります。どうやら、npm search 相当の機能は提供されていないようです。
$ npm search aws
npm ERR! code E404
npm ERR! 404 Not Found - GET https://oreno-codeartifact-${AWS_ACCOUNT_ID}.d.codeartifact.ap-northeast-1.amazonaws.com/npm/oreno-repo/-/v1/search?text=aws&size=20&from=0&quality=0.65&popularity=0.98&maintenance=0.5 - Not Found
npm ERR! 404
npm ERR! 404  'search' is not in this registry.
npm ERR! 404 You should bug the author to publish it (or use the name yourself!)
npm ERR! 404
npm ERR! 404 Note that you can also install from a
npm ERR! 404 tarball, folder, http url, or git url.

npm ERR! A complete log of this run can be found in:
npm ERR!     /path/to/.npm/_logs/2021-11-25T14_56_38_526Z-debug.log
マイ npm パッケージを登録する
適当にディレクトリを作成し、npm init して、適当なコード (index.js) と適当な package.json を用意します。
$ mkdir sample
$ cd sample
$ npm init
$ cat index.js
module.exports = function() {
  console.log('Hello World!!')
}
$ cat package.json
{
  "name": "oreno-sample",
  "version": "0.0.1",
  "description": "sample",
  "main": "index.js",
  "scripts": {
    "test": "echo \"Error: no test specified\" && exit 1"
  },
  "author": "inokappa",
  "license": "ISC"
}
尚、事前に aws codeartifact login を済ませておきましょう。
$ npm publish
以下のように出力されます。
$ npm publish
npm notice
npm notice 📦  oreno-sample@0.0.1
npm notice === Tarball Contents ===
npm notice 63B  index.js
npm notice 222B package.json
npm notice === Tarball Details ===
npm notice name:          oreno-sample
npm notice version:       0.0.1
npm notice filename:      oreno-sample-0.0.1.tgz
npm notice package size:  319 B
npm notice unpacked size: 285 B
npm notice shasum:        xxxxxxxxxxxxxxxxxxxxxxxxxxxxxxxxxxxxxxxxxxx
npm notice integrity:     sha512-oCZdKOIqjF0nC[...]OJdspBxFwxXKA==
npm notice total files:   2
npm notice
+ oreno-sample@0.0.1
あら、簡単。念の為、パッケージがリポジトリに登録されているかを確認。以下のように出力されます。
$ aws codeartifact list-packages \
  --domain oreno-codeartifact \
  --repository oreno-repo
{
    "packages": [
        {
            "format": "npm",
            "package": "oreno-sample"
        }
    ]
}
いい感じです。CodeArtifact にマイ npm パッケージが登録されていることを確認しました。
マイ npm パッケージを使ってみる
別のディレクトリをこさえて、npm init します。こちらも、事前に aws codeartifact login を済ませておきましょう。ドキュメントによると、このコマンドによって取得出来るトークンの期限は 12 時間とのことです。
$ npm init
先程、CodeArtifact に登録した oreno-sample パッケージをインストールします。
$ npm install oreno-sample@0.0.1

added 1 package in 967ms # インストール成功

# package.json に登録されている
$ cat package.json
{
  "name": "sample-project",
  "version": "0.0.1",
  "description": "",
  "main": "index.js",
  "scripts": {
    "test": "echo \"Error: no test specified\" && exit 1"
  },
  "author": "",
  "license": "ISC",
  "dependencies": {
    "oreno-sample": "^0.0.1"
  }
}
oreno-sample パッケージを利用したコードを書いてみます。
$ vim index.js
const oreno = require('oreno-sample');
oreno();
実行してみます。
$ node index.js
以下のように出力され、oreno-sample パッケージが利用されているようです。
$ node index.js
Hello World!!
いい感じです。意図した通り、マイ npm パッケージを利用することが出来ました。
ということで
今回は、AWS CodeArtifact を使って、オリジナルの npm パッケージを登録して、そのパッケージをプロジェクトで利用する流れを書きました。
AWS CodeArtifact は、思ったよりも簡単に利用出来るし、IAM を利用したアクセス制限等、AWS の各種サービスと協調して利用することを考えると、Github Packages よりも使いやすいのでは... と考えています。
次回は、CircleCI や Github Actions の CI/CD 環境で利用したり、既存パッケージリポジトリのプロキシとして利用する方法等について書いてみようと思います。